BF1942 Debugger Multifunctionality Tutorial
Posted: Fri Dec 11, 2009 5:57 pm
Creating Object Lightmaps, Terrain Lightmaps and Merging Lightmaps with the debugger
1.) Create a folder in your root BF42 folder named "ShadowWork".
2.) Here you have to set up folders with the regular game paths (so create a folder "levels", then create a folder with "Mapname", then with "Textures". (so it looks e.g. like "Battlefield 1942\ShadowWork\bf1942\levels\MAPNAME\textures\")
3.) Put your maps' texture files (Tx01x01.dds etc.) in "Textures" as well as objectlightmaps/terrainlightmaps.con in the map main folder.
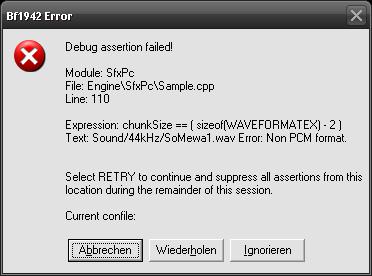
4.) Now you have to convert all the dds files into tga so the debugger can work with them, it can't work directly with dds!
Now you can decide on how you want this. You can either create batch files (.bat) or simply use modified shortcuts. Procedure is the same really, so I'll go for shortcuts.
1.) Create a shortcut of the Bf1942_r.exe
2.) Now open its properties and change the "target" line like this:
This line is for generating terrain lightmaps.
Now repeat repeat these two steps and use these codes for the other functions:
Generating Object Lightmaps:
Merging Lightmaps:
There should appear a new subfolder called "merged" with the merged textures. Remember to convert them back to dds to decrease filesize when you pack your map up later.
Now you have 3 shortcuts which allow you to quickly generate lightmaps etc. for your maps without ever having to start BC42 . Obviously you always have to edit them for the correct MAPNAME, but that's a matter of seconds.
Creating .rfa with the debugger
There is a genuine reason why you should use the debugger for packing your .rfa files. It doesn't break them. Every other GUI tool out there destroys parts of .rfa files during packing up. Even the famed WinRFA has a flaw: If you compile your map data with it, it destroys the envmap.rcm and thus you will have NO Envmap effects on your map (the chrome shiny reflections on some weapons&vehicles).
And, it's simple and super fast too .
Initial setup:
The debugger only packs files that are in "Battlefield 1942 (your game root)\bf1942". Same rules as for lightmap generation apply, you have to set them up acording to the BF filepaths. So mapfiles go in "Battlefield 1942\bf1942\levels\MAPNAME\" . Same goes for every other rfa files, just put them in the correct folder .
Then simply create a shortcut to your bf1942_r.exe and add this to the "Target" line in its properties:
I think the commands are pretty self-explanatory, but ask if you have questions.
______________________________________________
I have all this awesome knowledge from "Apache Thunder" and only rewrote it to give it a tutorial form .
1.) Create a folder in your root BF42 folder named "ShadowWork".
2.) Here you have to set up folders with the regular game paths (so create a folder "levels", then create a folder with "Mapname", then with "Textures". (so it looks e.g. like "Battlefield 1942\ShadowWork\bf1942\levels\MAPNAME\textures\")
3.) Put your maps' texture files (Tx01x01.dds etc.) in "Textures" as well as objectlightmaps/terrainlightmaps.con in the map main folder.
4.) Now you have to convert all the dds files into tga so the debugger can work with them, it can't work directly with dds!
Now you can decide on how you want this. You can either create batch files (.bat) or simply use modified shortcuts. Procedure is the same really, so I'll go for shortcuts.
1.) Create a shortcut of the Bf1942_r.exe
2.) Now open its properties and change the "target" line like this:
Code: Select all
BF1942_r.exe" +game DesertCombat +workingFolder "ShadowWork\" +traceTerrainShadows "bf1942\levels\MAPNAME\" MAPNAME\lmList.dat "ShadowWork\bf1942\levels\MAPNAME\textures"Now repeat repeat these two steps and use these codes for the other functions:
Generating Object Lightmaps:
Code: Select all
BF1942 +game DesertCombat +workingFolder "ShadowWork\" +traceObjectShadows "bf1942\levels\MAPNAME\"Code: Select all
BF1942 +game DesertCombat +workingFolder "ShadowWork\" +mergeTerrainShadows "bf1942\levels\MAPNAME\ 1.5 0.6"Now you have 3 shortcuts which allow you to quickly generate lightmaps etc. for your maps without ever having to start BC42
Creating .rfa with the debugger
There is a genuine reason why you should use the debugger for packing your .rfa files. It doesn't break them. Every other GUI tool out there destroys parts of .rfa files during packing up. Even the famed WinRFA has a flaw: If you compile your map data with it, it destroys the envmap.rcm and thus you will have NO Envmap effects on your map (the chrome shiny reflections on some weapons&vehicles).
And, it's simple and super fast too
Initial setup:
The debugger only packs files that are in "Battlefield 1942 (your game root)\bf1942". Same rules as for lightmap generation apply, you have to set them up acording to the BF filepaths. So mapfiles go in "Battlefield 1942\bf1942\levels\MAPNAME\" . Same goes for every other rfa files, just put them in the correct folder
Then simply create a shortcut to your bf1942_r.exe and add this to the "Target" line in its properties:
Code: Select all
+makeArchive Bf1942/Levels/MAPNAME 1 1______________________________________________
I have all this awesome knowledge from "Apache Thunder" and only rewrote it to give it a tutorial form